You know that feeling when you leave the salon? Hair bouncing, swinging, catching the light like a shampoo commercial? And then you try to recreate it at home and end up with... flat, frizzy, disappointing hair. I am going to teach you how to get 80% of that salon blowout at home. Not 100% — we are not magicians here — but enough that people will ask if you just got your hair done.
What You Need
Essential Tools:
- • Hair dryer with concentrator nozzle — seriously, use the nozzle. It focuses the airflow and is what creates that smooth, polished finish. Without it you are just blasting hot air everywhere. See our best hair dryers of 2026 picks.
- • Round brush — ceramic or boar bristle, 2-3 inch diameter for medium to long hair, 1.5 inch for short hair. Or a hot air brush if you prefer a one-tool approach. Ceramic barrels heat evenly and add shine. Boar bristle grips hair better for tension and distributes natural oils from root to tip.
- • Sectioning clips — alligator clips or duckbill clips, at least 4-6 of them. You cannot do a proper blowout without sections. Period.
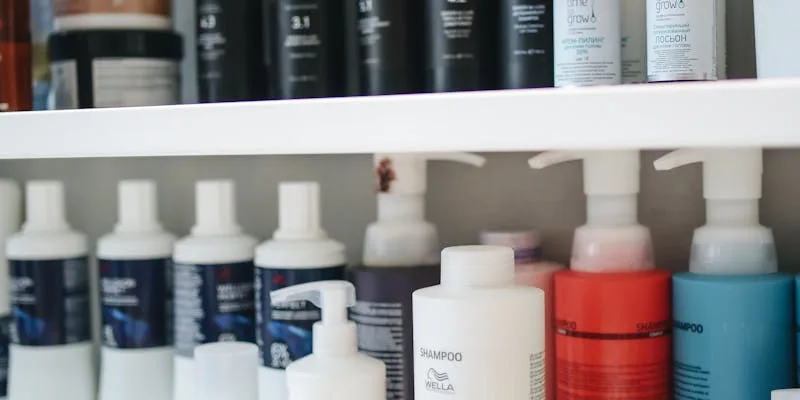
Essential Products:
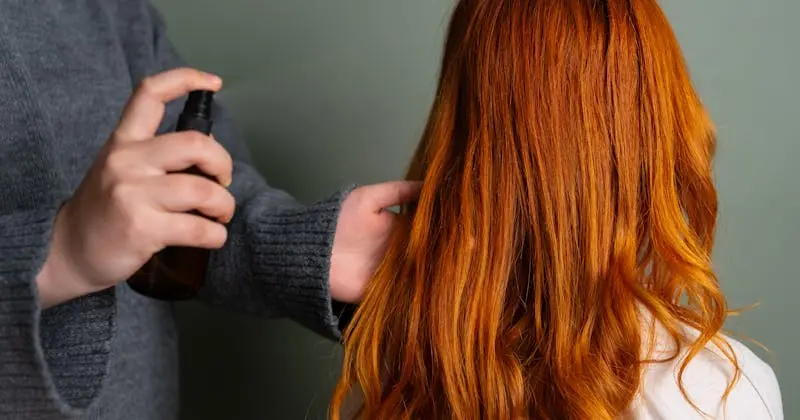
- • Heat protectant spray — apply to damp hair before any heat touches it. This is non-negotiable. A good heat protectant creates a thermal barrier that prevents moisture loss and cuticle damage. Apply from mid-lengths to ends, focusing on the most vulnerable areas.
- • Volumizing mousse or root lifter — this is what gives your blowout that salon "lift." Apply directly at the roots, lifting sections to get the product right at the scalp. Mousse is lighter and better for fine hair. Root lifter spray works well on all hair types.
- • Smoothing serum or cream — for the ends only. This controls flyaways and adds that glossy finish. A little goes a very long way — start with a pea-sized amount and add more only if needed. Too much will make your hair look greasy.
- • Light-hold hairspray — optional, for setting the finished style. Choose a flexible-hold formula that maintains movement. Stiff hairspray defeats the purpose of a bouncy blowout.
Our Tool Recommendations
- Best dryer for blowouts: ghd Helios — powerful airflow with a narrow concentrator nozzle that creates precision. View on Amazon
- Best round brush: Olivia Garden NanoThermic Ceramic Round Brush — ceramic barrel heats evenly, vented design speeds drying, and the bristle grip is excellent. View on Amazon
- Best heat protectant: GHD Heat Protect Spray — lightweight, no residue, protects up to 450 degrees. View on Amazon
- Best volumizing mousse: Kenra Volume Mousse 12 — firm hold without crunch, adds body at the root. View on Amazon
- Best smoothing serum: Moroccanoil Treatment — the classic argan oil serum that adds shine without weight. View on Amazon
The Step-by-Step
Step 1: Prep Is Everything (5 minutes)
Towel dry gently — no rubbing. Use a microfiber towel or old cotton t-shirt and squeeze the water out. Rubbing with a regular towel roughs up the cuticle and creates frizz before you even start. Apply heat protectant from mid-lengths to ends in a downward motion. Apply volumizing mousse at the roots — lift sections and get it RIGHT at the scalp. Use your fingertips to work it into the root area so it can lift the hair from the base.
Now rough dry your hair until it is 70-80% dry. This is crucial — trying to style soaking wet hair will take forever and you will get frustrated. Point the dryer down the hair shaft while rough drying, shake your fingers through the hair to separate it, and keep the dryer moving. Do not focus on perfection here — you are just removing most of the moisture. This step alone can cut your total blowout time by 10-15 minutes.
Step 2: Section Like a Pro (2 minutes)
Divide your hair into sections. I recommend:
- • Bottom section (nape of neck to ears) — start here because it dries fastest and is hidden underneath
- • Middle section (ears to temples) — the bulk of your hair, this is where volume builds
- • Top section (temples up) — the most visible section, save it for last so you can take your time
- • Crown section (very top, for volume) — this small section gets special treatment for maximum lift
Clip everything except the bottom section up and out of the way. Working in sections is the single biggest difference between a DIY attempt and a salon result. It ensures every strand gets proper attention and even heat distribution. If you skip this step, you will end up with some sections overworked and frizzy and others still damp underneath.
Step 3: The Technique (15-20 minutes)
This is where the magic happens. Take a 2-inch section of hair. Wrap it around your round brush at the ends. Roll the brush UNDER (toward your face for face-framing pieces, away for back sections) and up toward your scalp.
Now here is the key: point your dryer nozzle DOWN the hair shaft (from root to end). This smooths the cuticle. Hold the dryer 6 inches away. This distance matters — too close and you risk heat damage and frizz, too far and you lose the styling power of the focused airflow.
Dry each section while rolling the brush through. The tension from the brush + the heat + the direction of airflow = smooth, voluminous hair. Maintain steady tension on the hair as you roll the brush through — do not let the hair go slack. This tension is what creates the smooth, bouncy finish.
For each section, follow this pattern: start at the roots and dry with the brush pulled taut for 5-10 seconds, then slowly roll the brush down to the mid-lengths, pause and dry for another 5 seconds, then roll to the ends and wrap the hair around the brush. Hold the dryer on the ends for 5 seconds to set the bend. The whole process should take about 30-45 seconds per section.
Step 4: Cool Shot (2 minutes)
Once a section is dry, hit it with the cool shot button while still wrapped around the brush. This sets the style and adds shine. Count to 5, then release. The science is simple: heat opens the cuticle (which is how you shape the hair), and cold air closes it (which locks in the shape and creates shine). Skipping the cool shot is like curling your eyelashes and skipping the mascara — the shape will not hold. Every single section should get a cool blast. It adds one to two minutes to your total time but doubles how long the blowout lasts.
Step 5: Crown Volume Trick
For the top sections, over-direct the hair. This means pulling the hair UP and BACK (toward the back of your head) while drying. This creates lift at the crown. Dry against the direction your hair naturally falls. This is the salon secret for that "I just had a blowout" volume — the crown section is styled with extra lift so it sits elevated above the rest of the hair.
For even more volume, try this trick: once the crown section is dry, wrap it around the round brush, blast with heat for 10 seconds, then clip the rolled section in place with a duckbill clip and leave it to cool completely while you finish the rest of your hair. When you release the clip, you will have salon-level root lift that lasts all day.
Step 6: Finish (2 minutes)
Once everything is dry and cool, flip your head upside down and gently shake out the roots with your fingers. Flip back up. Apply 1-2 drops of smoothing serum to ends only — rub it between your palms first, then press it into the ends with a scrunching motion. Lightly mist with hairspray if needed, holding the can at least 10 inches from your head so you get an even, light coat rather than stiff, crunchy spots.
Blowout Tips by Hair Type
Fine / Thin Hair
- • Use medium heat setting only — high heat on fine hair leads to damage and flat results
- • Smaller sections (1 inch) for more volume
- • Focus volumizing products at roots only
- • Avoid heavy serums — use a lightweight shine spray instead
- • Use a smaller round brush (1.5 inch) for more bend and body
Thick / Coarse Hair
- • Use high heat with a powerful dryer (2000W+)
- • Take smaller sections — trying to dry too much at once leads to frizz
- • Apply a smoothing cream before drying for frizz control
- • Use a larger round brush (2.5-3 inch) for smoothing
- • Extra time on the cool shot — thick hair holds heat longer and needs more cooling to set
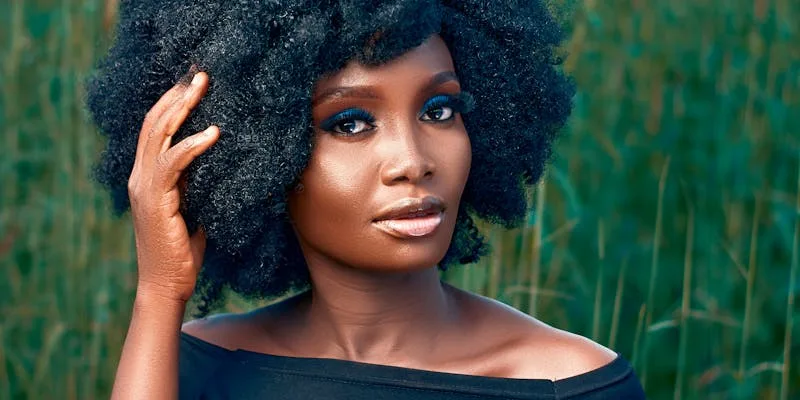
Wavy / Curly Hair
- • Rough dry to 80% before sectioning — this is even more important for curly hair
- • Use smoothing product throughout, not just at ends
- • Take 1-inch sections maximum — the tighter your curls, the smaller your sections should be
- • Multiple passes may be needed per section — go slow and methodical
- • Consider a paddle brush for rough drying before switching to round brush for styling
Short Hair (Bob / Pixie)
- • Use a small round brush (1-1.5 inch diameter)
- • Focus on direction and shape rather than volume
- • The face-framing technique is crucial — direct hair away from the face for a polished look
- • Less product overall — a dime-sized amount of mousse is plenty
- • Total blowout time should be 10-15 minutes — do not overthink it
Common Mistakes
Don't
- • Skip rough drying (too wet = takes forever)
- • Use high heat on fine hair
- • Hold dryer too close
- • Skip sections (uneven results)
- • Rush through it
- • Point the nozzle up the shaft (creates frizz)
- • Use too much product (weighs hair down)
Do
- • Section your hair properly
- • Point nozzle down the hair shaft
- • Use the cool shot
- • Take your time
- • Practice (seriously, it takes time)
- • Maintain tension on the brush
- • Invest in good tools — they make a huge difference
Making It Last
A good blowout should last 3-5 days. For even more longevity strategies, read our full guide on how to make your blowout last. Here is how to extend it:
- Sleep on silk: Cotton creates friction. Silk or satin pillowcases (or a bonnet) preserve the style. If you do not want to buy a silk pillowcase, wrap your hair loosely in a silk scarf before bed. The difference in how your hair looks in the morning is dramatic.
- Use dry shampoo: At the roots on day 2 or 3. Massage it in with your fingertips, then hit the roots with a quick blast from the dryer to reactivate the volume. Apply the dry shampoo the night before for best results — it absorbs oil overnight and your hair looks fresher in the morning.
- Touch up strategically: Just do the front pieces or crown if they have flattened. You do not need to redo the whole blowout. A 5-minute touch-up of the face-framing sections and crown can make a day-3 blowout look like day-1.
- Don't over-brush: Let the style settle. Excessive brushing creates frizz and removes the shape you worked to create. If you need to smooth flyaways, use a boar bristle brush and gentle, downward strokes only.
- Avoid humidity and steam: Do not stand over a pot of boiling pasta. Keep the bathroom door open when others shower. Humidity is the blowout's worst enemy — it reactivates your hair's natural texture and undoes all your work.
Real Talk
Your first attempt will not look like a salon blowout. Your fifth attempt will be better. By your tenth, you will be getting compliments. This is a skill, and skills take practice. But once you get it, you have got it — and you will save hundreds on salon blowouts. The average salon blowout costs $45-75. If you normally get one every two weeks, that is $1,200-2,000 per year. Even if you invest $200 in great tools, you break even in two months.
Frequently Asked Questions
How long should a blowout take?
For a full at-home blowout, expect 25-40 minutes depending on your hair length and thickness. That breaks down to about 5 minutes of prep (towel dry, apply products, rough dry to 80%), 2 minutes of sectioning, 15-25 minutes of actual styling (this is where hair length and thickness create the biggest variation), and 2-5 minutes for finishing. Short bobs take closer to 15-20 minutes total, while long, thick hair can take up to 45 minutes. If your blowout is taking over an hour, you are likely starting with hair that is too wet or taking sections that are too large. Speed comes with practice — most people cut their time in half after 5-10 sessions.
Can I blowout curly hair straight?
Absolutely, but it takes more time and technique. The key is working with very small sections (1 inch or less), maintaining constant tension on the round brush, and using a powerful dryer on medium-high heat. Start by rough drying with a paddle brush to eliminate most of the curl pattern, then switch to a round brush for the final smoothing pass. You will likely need 2-3 passes per section compared to 1-2 for straight or wavy hair. Use a smoothing cream throughout the hair before drying to help manage frizz and reduce the curl's tendency to spring back. Expect your blowout to take 30-50 minutes for curly hair. The results will look amazing but may not last as long — curly hair has a strong memory and humidity will reactivate the curl pattern. A light finishing spray with humidity protection helps extend the style.
What is the best brush for blowouts?
A round ceramic or ceramic-tourmaline brush is the gold standard for blowouts. The ceramic barrel heats evenly when the dryer hits it, creating an additional heating surface that speeds up drying and smooths the cuticle. For diameter: use a 1.5-inch brush for short hair and tighter curls, a 2-inch brush for medium-length hair and moderate volume, and a 2.5-3 inch brush for long hair and maximum smoothing. Boar bristle brushes are excellent for smoothing and distributing natural oils, but they do not grip as well on very slippery or fine hair. Our favorite is the Olivia Garden NanoThermic series — professional-grade quality, comfortable grip, and the ceramic barrel genuinely speeds up the process. If you want a simpler option, a hot air brush like the Revlon One-Step combines the dryer and brush into one tool, which is easier for beginners.
Disclosure: This post contains affiliate links. I earn a small commission if you purchase through my links at no extra cost to you. Thanks for supporting Sis Hairven!
blog.related_articles
Olaplex Complete Guide: No. 3, 6, 7, 8, 9 Explained
The ultimate guide to the Olaplex system. Learn what each product does, how to use them together, and build your perfect routine.
How to Make Hair Color Last Longer: Colorist Secrets Revealed
Professional tips for extending the life of your color. From washing techniques to product recommendations, keep your color vibrant longer.
Thick Hair Management: Taming & Styling Strategies
Essential tips for managing thick, heavy hair. Learn about thinning techniques, the right tools, and products that work with your hair type.
blog.newsletter_cta
blog.subscribe_prompt
Find Your Perfect Products
Shop our curated selection of salon-quality products, or explore more expert guides and reviews.