You just spent $50+ on a professional blowout, or 45 minutes perfecting your hair at home. The style is flawless – smooth, bouncy, full of volume. Fast forward to day two: flat, greasy, slept-on. Sound familiar? As a stylist who gives dozens of blowouts weekly, I'm sharing the secrets to making that perfect style last 5-7 days.
What's Possible
Day 1
Fresh & perfect
Day 3
Still voluminous
Day 5
Textured & chic
Day 7
Time to wash
The Foundation: A Proper Blowout
The longevity of your blowout starts with how it's styled. A rushed, improperly executed blowout won't last past day one, no matter what products you use. Here's what professionals do differently:
Professional Blowout Technique
Prep is everything
Start with a clarifying shampoo to remove all product buildup. Follow with a lightweight conditioner only on ends. Towel-dry thoroughly – excess water makes blow-drying take twice as long.
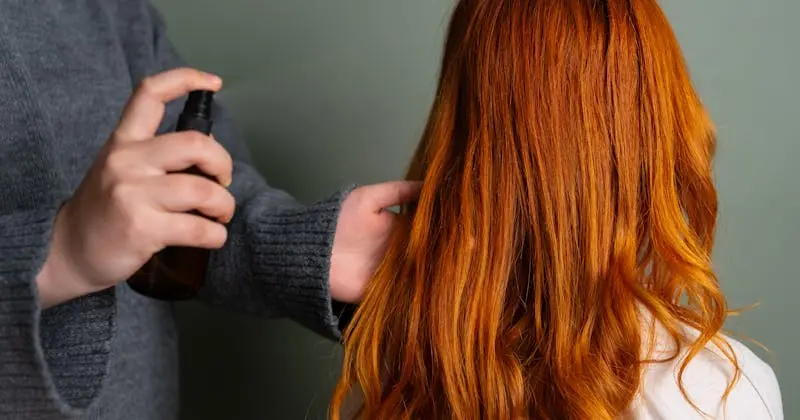
Apply the right products
Heat protectant is non-negotiable. For volume, add a root-lifting mousse. For smoothness, use a lightweight serum on ends only. Too much product = greasy hair by day two.
Rough dry first
Blast hair with medium heat until 70% dry. This sets the foundation and saves time during the styling phase.
Section and style
Work in small sections (2-3 inches). Use a round brush, directing roots upward for volume and pulling ends under for smoothness. The tension is key – it locks in the style.
The cool shot
This is crucial: hit each section with cool air for 5-10 seconds before moving to the next. Cool air sets the style and seals the cuticle, giving you that salon finish that lasts.
Set with product
Finish with a lightweight hairspray (hold arms-length away) and a serum or oil on ends for shine and frizz control.
Day 1: The Golden Hour
The first 24 hours are critical. What you do (and don't do) on day one sets the stage for the entire week.
Day 1 Do's
- ✓ Let it cool completely – Don't touch, clip, or pin hair for at least 2 hours after styling
- ✓ Avoid touching – The oils from your hands transfer to hair and cause grease
- ✓ Sleep on silk – A silk pillowcase reduces friction that causes frizz and flattening
- ✓ Use minimal product – One light mist of hairspray is enough; over-producting leads to buildup
- ✓ Pineapple for bed – Gather hair loosely at the crown with a silk scrunchie
Day 1 Don'ts
- ✗ Don't use dry shampoo yet (save it for day 2+)
- ✗ Don't wear tight ponytails or hats
- ✗ Don't work out intensely (sweat is the enemy of blowouts)
- ✗ Don't get caught in the rain
- ✗ Don't play with your hair out of habit
Days 2-3: Maintaining Volume
As natural oils start to accumulate at the roots, volume at the crown often deflates first. Here's how to revive it:
The Morning Revival Routine
Step 1: Dry Shampoo at the Roots
Apply dry shampoo to roots BEFORE you need it – ideally the night before. Spray 6-8 inches from scalp, focusing on crown and hairline. Massage in with fingertips and let sit for 2 minutes before brushing through.
Step 2: Re-volumize
Flip your head upside down and massage roots vigorously for 30 seconds. Flip back up and use a large round brush to smooth the top layer while maintaining volume underneath.
Step 3: Touch Up with Heat
Use a curling iron (1-1.25 inch) to refresh any fallen sections. Curl away from the face for a modern look. Don't curl the ends – keep them straight for that "lived-in" vibe.
Recommended Dry Shampoo
Days 4-5: Embracing Texture
By day 4, your blowout has evolved. It's no longer about smooth perfection – it's about embracing the natural texture that comes with a few days of wear. This is when styled texture looks best.
Style Transformations
Day 4: Textured Waves
Add dry texturizing spray throughout, then use a curling wand to create loose, beachy waves. The natural oils actually help the waves hold better.
Style time: 10 minutes
Day 5: Sleek Low Pony
The accumulated oils make hair easier to smooth. Create a sleek low pony or bun using the natural texture to your advantage.
Style time: 5 minutes
Day 5: Braided Crown
Dirty hair braids beautifully. Create two braids on each side and pin them across the crown for a boho-chic look.
Style time: 15 minutes
Day 5: Half-Up Top Knot
Gather the top section into a messy top knot, leaving the rest down. The contrast between polished top and textured bottom is effortlessly chic.
Style time: 3 minutes
Essential for Textured Styles
Days 6-7: The Home Stretch
You're almost there! By day 6-7, your hair has significant oil buildup. It's time for strategic styling that works with, not against, the natural texture.
Best Styles for Oily Hair
- Sleek Bun: Use the natural oils to create a smooth, polished ballerina bun. The oil actually helps flyaways stay put.
- French Twist: Classic and sophisticated. The oils help the style stay secure without pins slipping.
- Fishtail Braid: Textured braids look better with some "grit" in the hair. Spray with texturizing spray before braiding.
- Milkmaid Braids: Two Dutch braids pinned across the top. Hide greasy roots while looking intentionally styled.
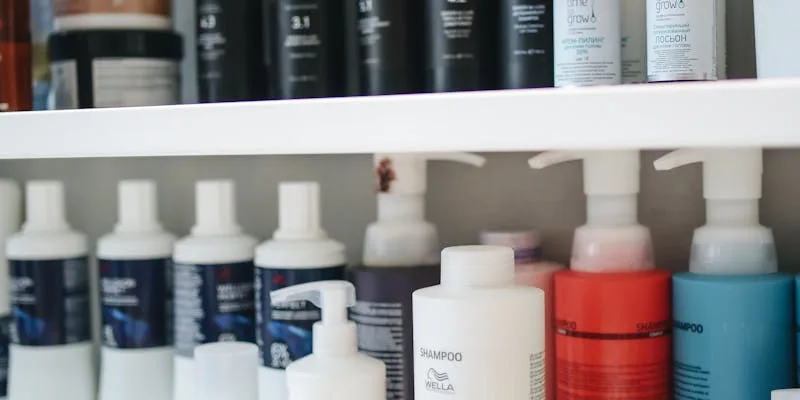
The Products That Make It Possible
Here are the must-have products in my blowout-extending arsenal:
Complete Product Lineup
| Product Type | Best For | When to Use |
|---|---|---|
| Dry Shampoo | Absorbing oil, adding volume | Days 2-7, mornings |
| Texturizing Spray | Adding grit, refreshing style | Days 4-7 |
| Lightweight Hairspray | Setting style, fighting humidity | Day 1, touch-ups |
| Serum/Oil | Smoothing ends, adding shine | Days 3-7 |
| Silk Accessories | Preventing damage while sleeping | Every night |
Sleep Strategies: Protect Your Style Overnight
How you sleep has the biggest impact on blowout longevity. Here's my night routine:
The Pineapple Method
Gather hair loosely at the crown of your head using a silk scrunchie. This keeps volume at the roots and prevents the back of your head from flattening. Sleep on a silk pillowcase for extra protection.
The Wrap Method
For straighter styles, wrap hair around your head (like a beehive) and secure with large pins. Cover with a silk scarf or bonnet. This maintains smoothness and prevents tangling.
Silk Is Non-Negotiable
Cotton pillowcases create friction that causes frizz and absorbs natural oils (and your hair products). Silk allows hair to glide smoothly and maintains moisture balance.
Essential Sleep Accessories
Lifestyle Tips for Maximum Longevity
Do This
- • Shower with a cap (don't get hair wet)
- • Use a shower cap when bathing
- • Apply dry shampoo before bed
- • Keep hands off your hair
- • Use a boar bristle brush daily
- • Embrace styles that work with texture
- • Carry a mini dry shampoo for touch-ups
Avoid This
- • High-intensity workouts (causes scalp sweat)
- • Touching your hair frequently
- • Wearing tight hats or headbands
- • Getting caught in rain or humidity
- • Using too much product
- • Sleeping on cotton pillowcases
- • Brushing when hair is damp from humidity
Quick Fixes for Common Blowout Problems
Problem: Flat Crown
Fix: Section out the top layer. Backcomb (tease) the under layers at the crown with a fine-tooth comb. Smooth the top layer over. Set with hairspray.
Problem: Greasy Roots
Fix: Apply dry shampoo the night before. In the morning, use a blow dryer on cool setting at the roots to reactivate the dry shampoo and add volume.
Problem: Frizzy Ends
Fix: Apply a tiny amount of hair oil or serum to ends only. Use a flat iron on low heat to smooth just the ends.
Problem: Weird Kinks
Fix: Lightly mist the kinked section with water, then use a round brush and blow dryer to reshape. The key is "lightly" – too much water ruins the dry sections.
The Bottom Line
A week-long blowout is absolutely achievable with the right technique and products. The keys are: starting with a properly executed blowout, using dry shampoo strategically, protecting hair while sleeping, and embracing the natural evolution of the style rather than fighting it.
Remember: by day 5, you're not maintaining a blowout anymore – you're rocking a textured, lived-in style that has its own beauty. Work with your hair, not against it, and you'll not only extend your style but also reduce heat damage from daily styling.
Pro Tip: The best blowout is one you don't have to do daily. By extending your style, you're actually improving your hair health by reducing heat exposure. Invest in the right products and techniques – your hair will thank you.
Frequently Asked Questions
Can fine hair really last a week?
Fine hair can actually last longer because it shows oil less than thick hair. The key is using volumizing products at the roots and not over-conditioning. Dry shampoo is your best friend.
What if I work out every day?
Try low-impact workouts that don't cause excessive sweating (yoga, pilates). If you do sweat, dry your hairline with a towel immediately and use dry shampoo at the roots. You may need to wash every 4-5 days instead of 7.
Does hair type affect how long a blowout lasts?
Yes! Straight hair tends to get oily faster but holds smoothness longer. Curly and textured hair can go longer between washes but may lose the straight style faster. Adjust your routine to your natural texture.
Is it bad to go a week without washing hair?
Not at all! The scalp naturally regulates oil production. Washing too frequently can actually cause the scalp to produce more oil. Many hair experts recommend washing 1-2 times per week for optimal hair health.
Related Articles
blog.related_articles
Olaplex Complete Guide: No. 3, 6, 7, 8, 9 Explained
The ultimate guide to the Olaplex system. Learn what each product does, how to use them together, and build your perfect routine.
How to Make Hair Color Last Longer: Colorist Secrets Revealed
Professional tips for extending the life of your color. From washing techniques to product recommendations, keep your color vibrant longer.

Thick Hair Management: Taming & Styling Strategies
Essential tips for managing thick, heavy hair. Learn about thinning techniques, the right tools, and products that work with your hair type.
blog.newsletter_cta
blog.subscribe_prompt
Find Your Perfect Products
Shop our curated selection of salon-quality products, or explore more expert guides and reviews.